The stump grinder functions as a vital tool that efficiently removes tree stumps. The performance of this tool depends entirely on the state of its cutter teeth and pockets during installation. The improper installation of these components results in reduced cutting performance and accelerated wear that might harm the machine. The following guide demonstrates how to correctly install sandvik stump grinder teeth and pockets to achieve peak performance.
Why Proper Installation Matters
Stump grinder teeth, along with pockets, function to cut through hardwood materials while producing small wood chips. Proper installation ensures:
- Maximum cutting efficiency.
- The machine experiences decreased wear and tear during operation.
- Improved safety during operation.
- Longer lifespan for teeth and pockets.
Tools and Materials Needed
The installation of new or sharpened stump grinder teeth and pockets requires proper attention.
- The required tools include a wrench or socket set, which depends on bolt dimensions.
- Torque wrench (for accurate tightening).
- Wire brush or cleaning tool.
- Anti-seize lubricant functions to stop rust formation while making future removal operations easier.
- Safety gloves and eye protection.
Step-by-Step Installation Guide
Prepare the Stump Grinder
- First, disconnect the stump grinder from power sources before turning off the machine.
- Thoroughly clean all areas of the grinding wheel and pockets to eliminate dirt along with wood debris and rust.
- Check the grinder for replacement of any damaged components that show signs of wear.
Extract All Worn-Out Teeth And Pockets From The Machine
- A wrench or socket set should be used to remove the bolts that secure the current teeth and pockets.
- Use a wire brush to clean the mounting areas before removing the worn-out parts.
- Check the bolts for signs of wear before deciding to replace them.
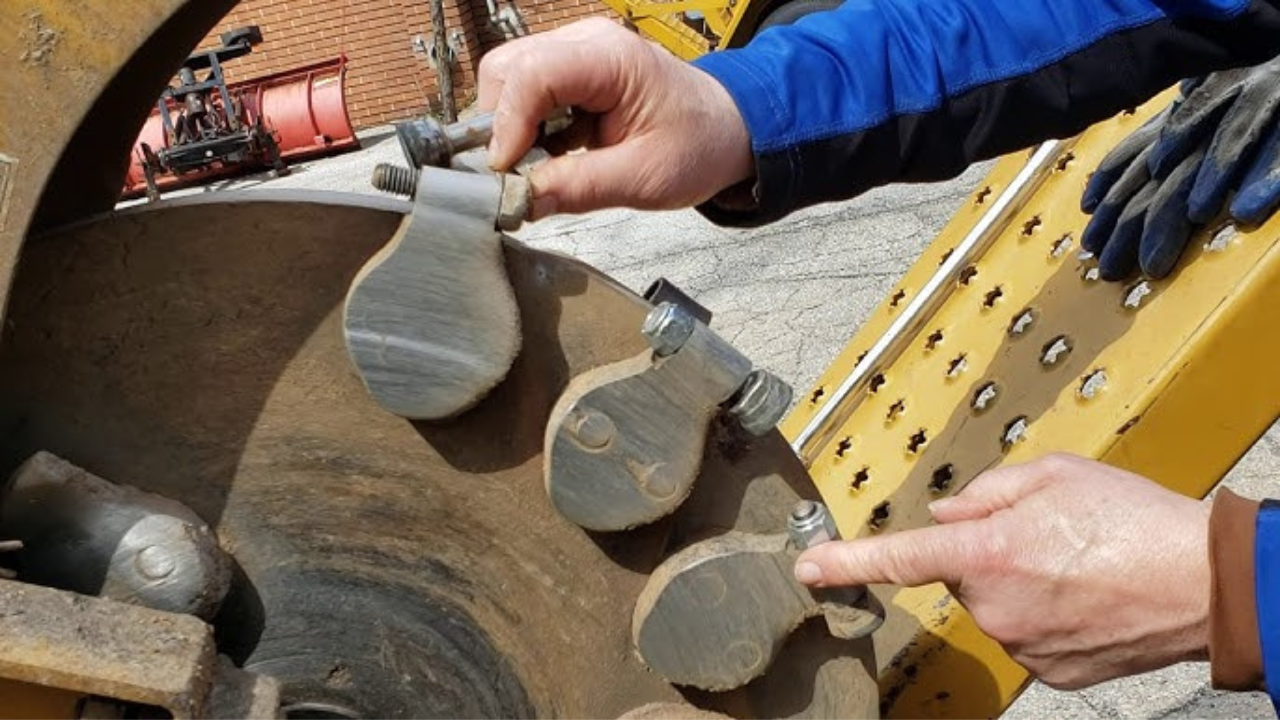
Install the New Pockets
- Position the new pockets directly onto the grinder wheel mounting holes.
- Secure the pockets by inserting the bolts. After that, tighten them by hand.
- You should tighten the bolts using a torque wrench while following the manufacturer’s specified torque values.
- The proper torque setting protects the bolts from becoming loose during grinder operation.
Install the Cutter Teeth
- Place the stump grinder teeth inside the pockets while making sure they have a secure fit.
- Fasten the pockets with proper mounting hardware. The fastening systems of these models differ between bolt attachments and locking systems.
- The teeth must be correctly positioned so cutting performance reaches its maximum capabilities.
Final Checks and Testing
- Verify that every bolt and fastener maintains proper tightness.
- A thin layer of anti-seize lubricant should be applied to prevent rust formation while making future replacements easier.
- First, test the stump grinder at low speed after connecting it to power.
Maintenance Tips for Longevity
- The cutting performance remains optimal when you inspect and sharpen teeth regularly.
- Regular cleaning of the grinder should remove all debris that accumulates after each operation.
- Regular inspection of bolts should be followed by periodic tightening to avoid bolt loosening.
Conclusion
The sustained operation, together with safety and extended service life, depends on correct stump grinder tooth and pocket installation. Regular maintenance of your grinder combined with proper implementation of these steps will boost operational efficiency while decreasing replacement expenses. The best outcomes come from selecting durable tungsten carbide options when you need high-quality stump grinder teeth and wear parts.